

Table of contents
- Overview
- Collect session fees with a One Access Code job
- Alternative workflow: Collect session fees with Prepay
- Provide a coupon for a future purchase
- Takeaway
Overview
This article explains how to collect a session fee through GotPhoto. This workflow serves as a workaround because scheduling tools such as Acuity and Calendly are not currently integrated with GotPhoto.
While we plan to offer an integrated scheduling option in the future, you can use a One Access Code job to collect payments in advance.
Collect session fees with a One Access Code job
1. Create the session fee product and price list
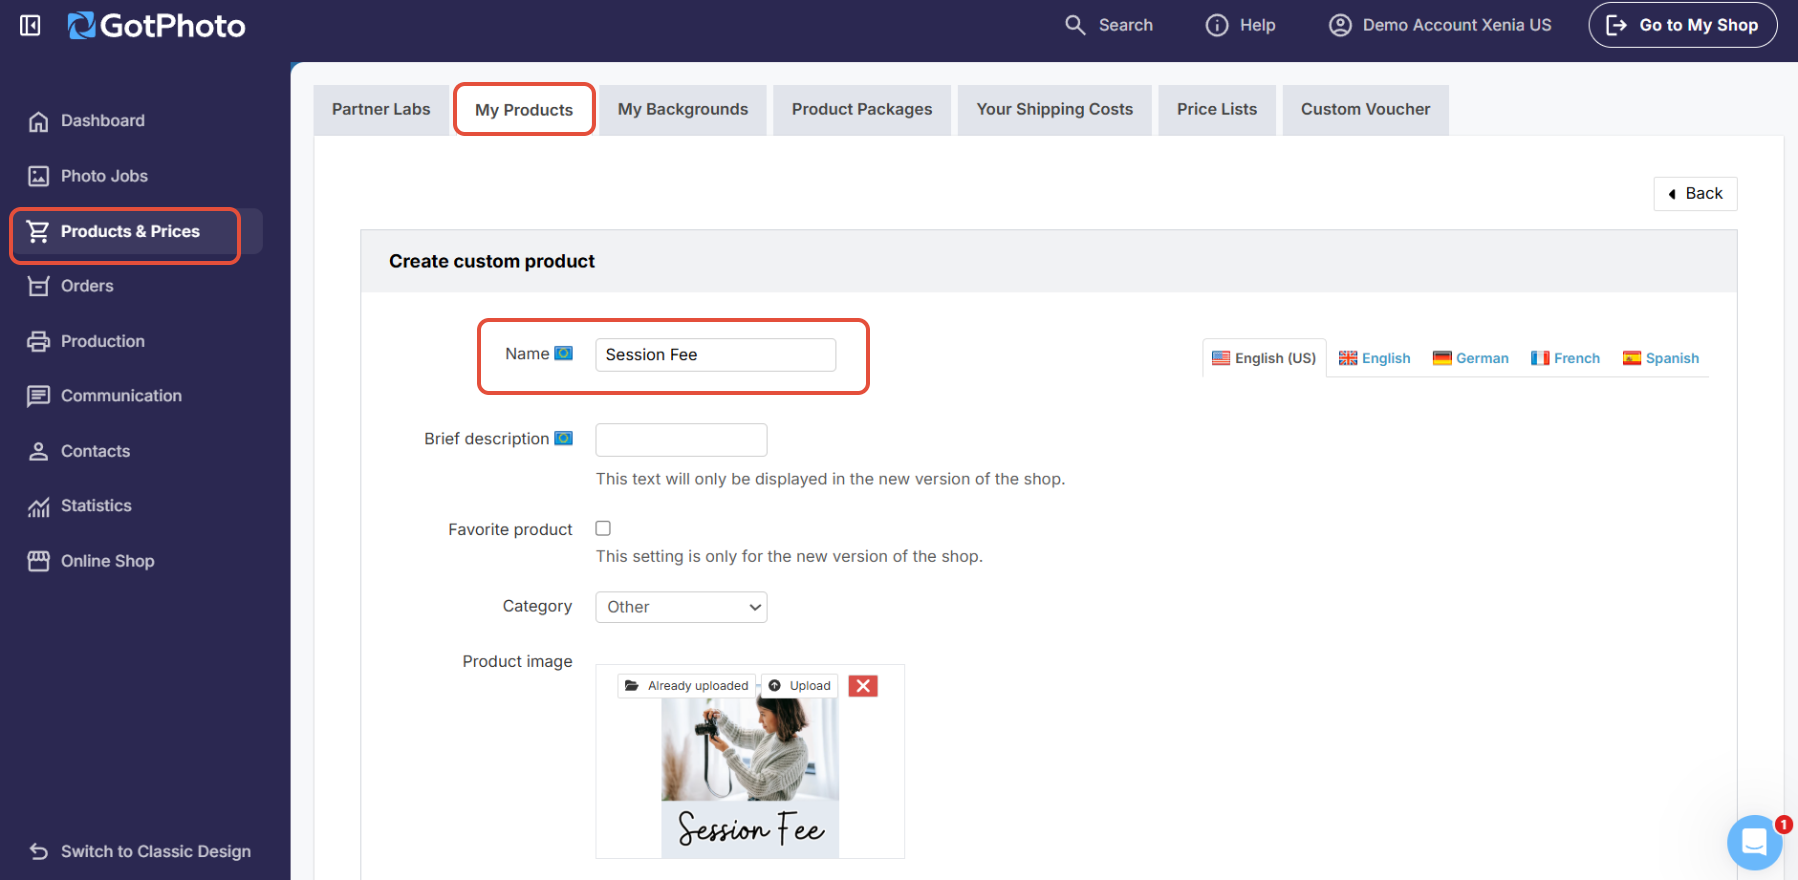
- Create a product under Additional services in My products, upload a matching product image, and, depending on your needs, name it Deposit or Session Fee
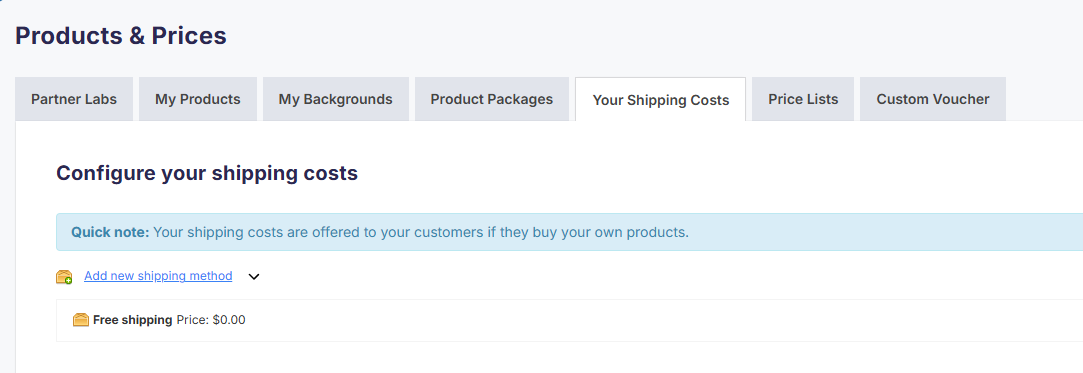
- In your Shipping Costs tab, set the shipping fee to 0.
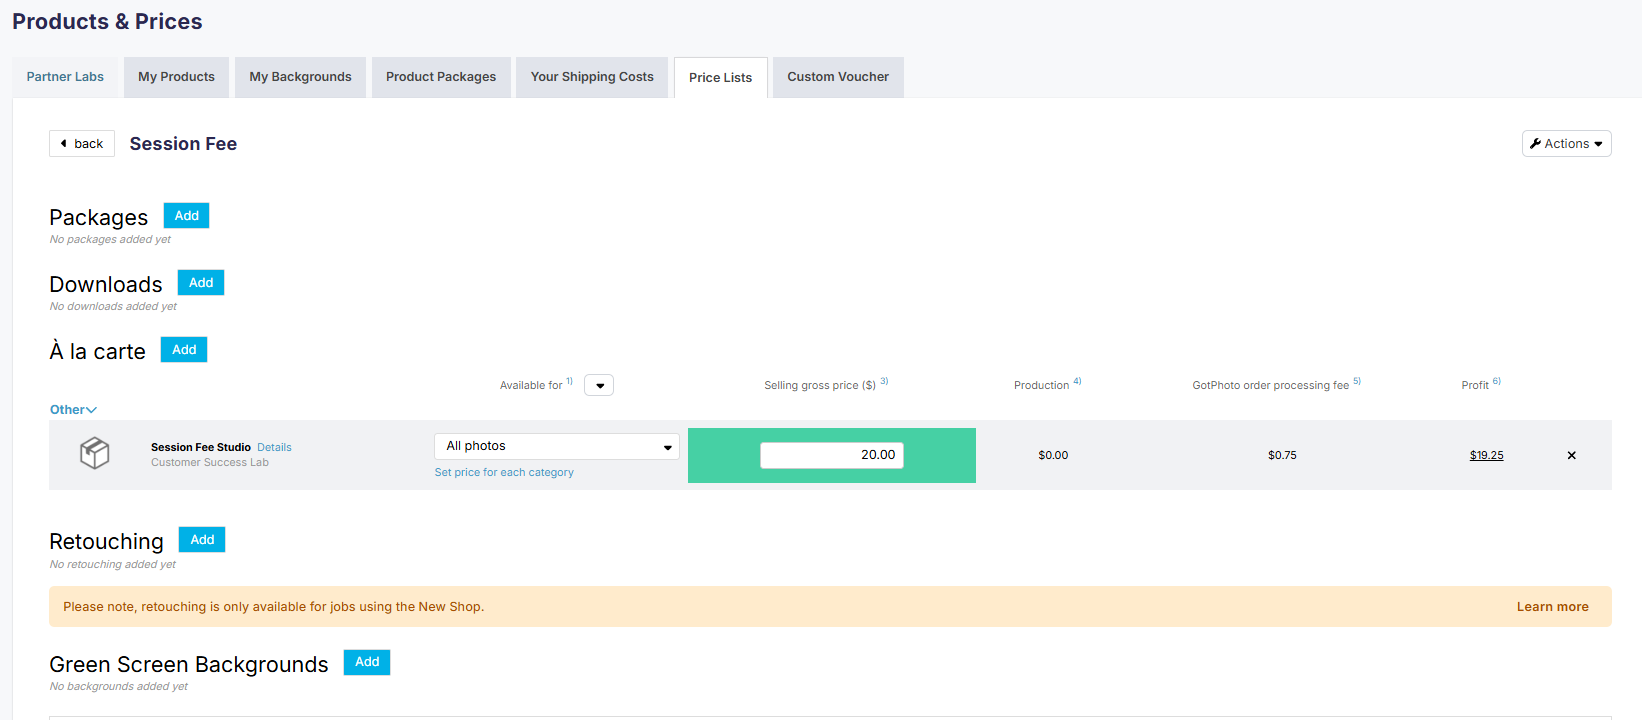
- Create a new price list and add the Session Fee product. Do not add any other print or download products. This job will only be used to give your customers the option to pay their session fee.
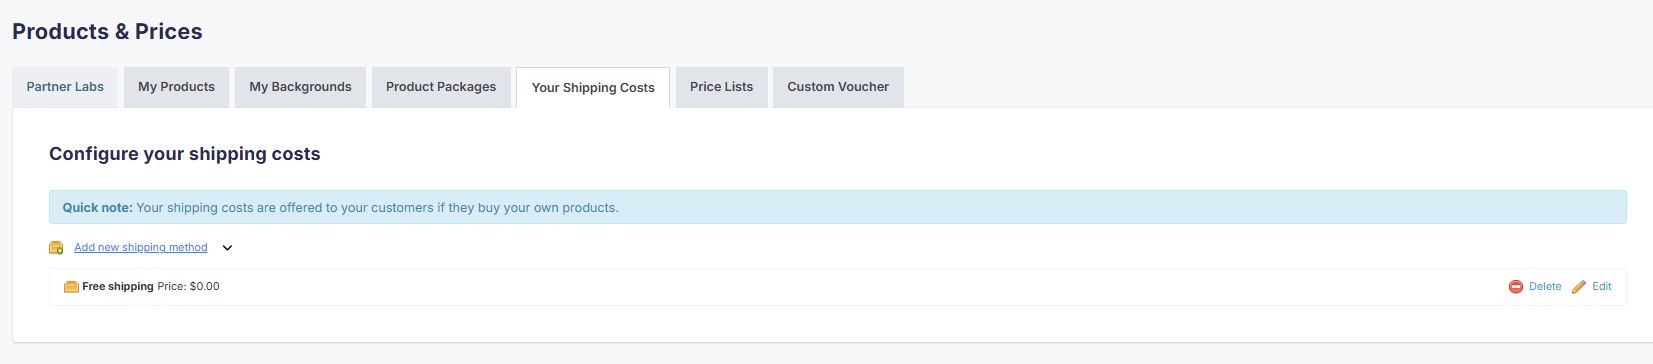
- In the Your shipping costs tab, configure free shipping.
2. Create a One Access Code job
- Create a new job and select the access type One Access Code.
- Enter an easy-to-remember access code.
- Select the Session Fee price list and save the job settings.
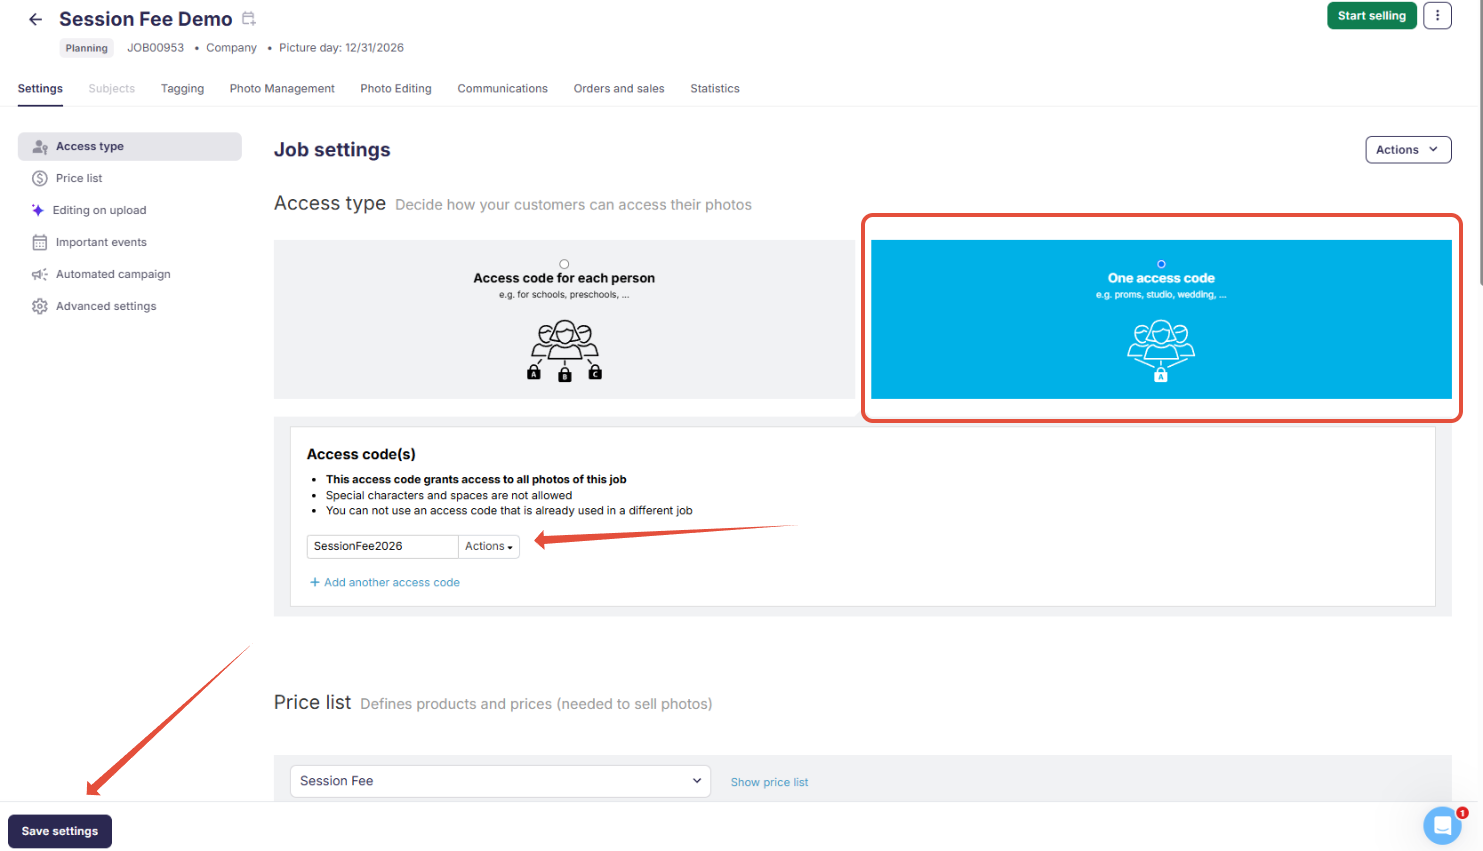
- Use direct shipping. If you do not select batch shipping, direct shipping is enabled automatically.
- Configure the archiving settings and save the job settings.
3. Optional: Create an automated campaign
You can use an automated campaign to send customers a scheduling link after they have paid the session fee.
- Create a new automated campaign and name it after your Session Fee job.
- Add a notification to the campaign and select the following settings:
- Trigger: After an order is placed
- Customer target group: Buyers
- Send messages to: All customers
- In the message, explain where customers can schedule their session and include the scheduling link.
- Save the campaign settings.
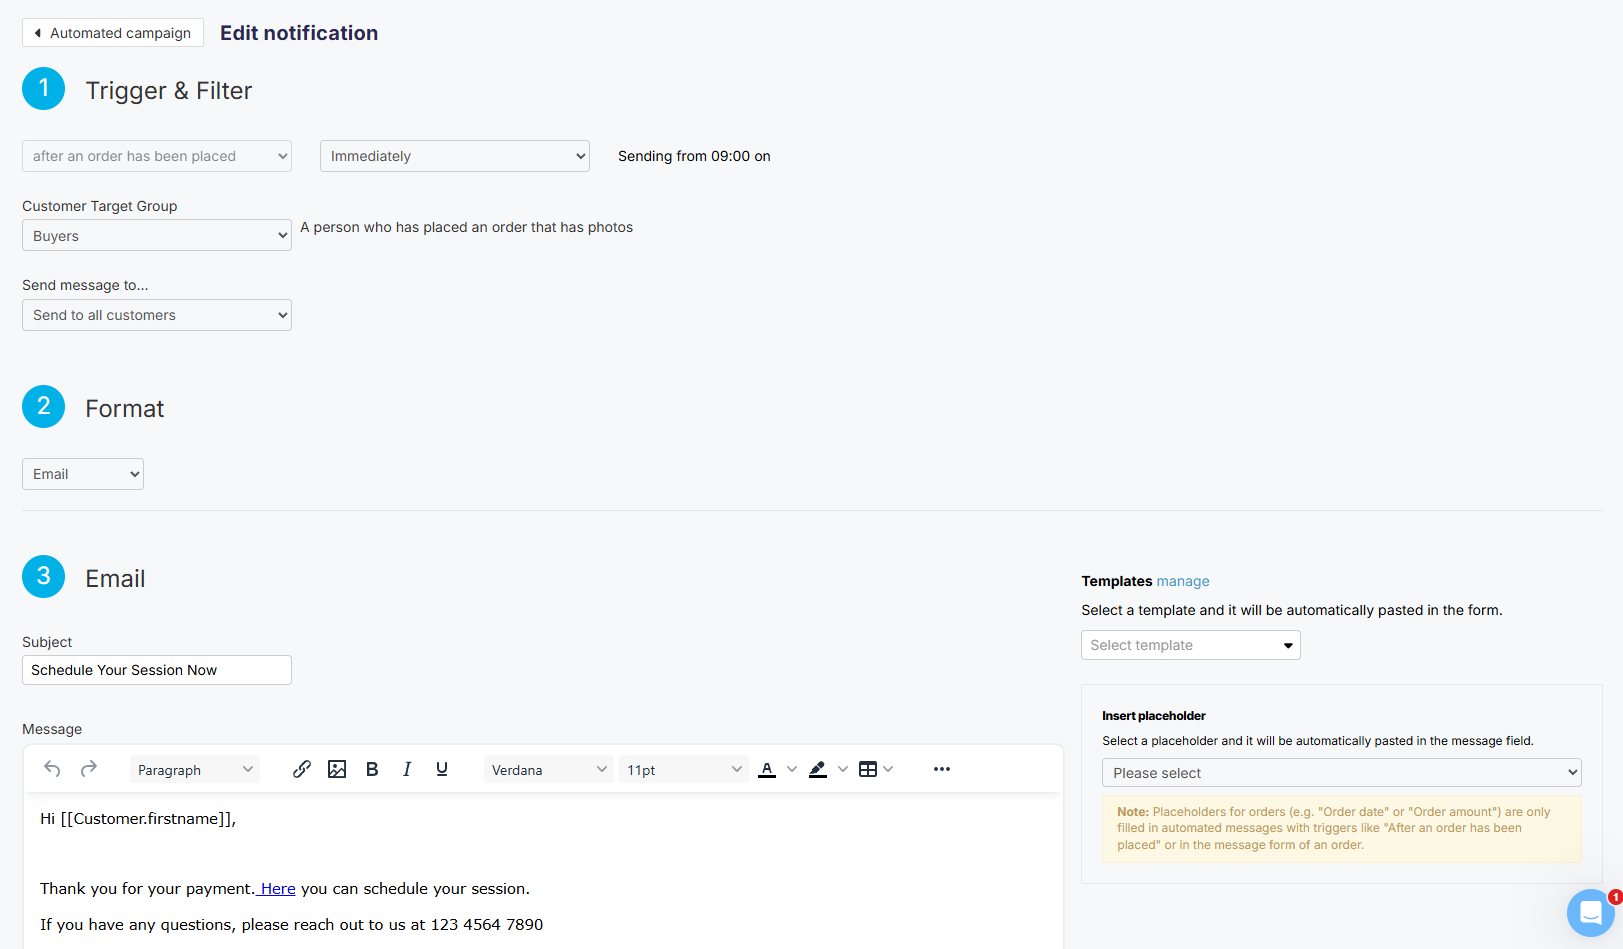
- Add the automated campaign to your Session Fee job and save the job settings.
4. Add a Session Fee page to your GotPhoto shop
- Use the search tool at the top of your dashboard to search for the job’s access code.
- Open the access code overview page and copy the Quick Login link.
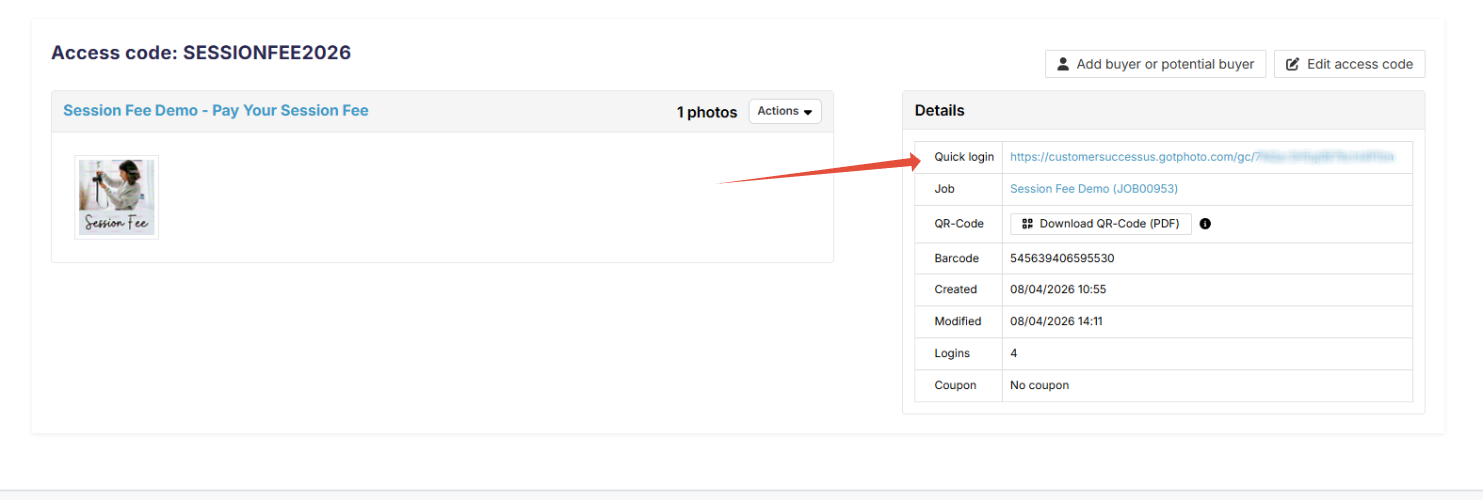
- Go to Online Shop > Pages & Menu.
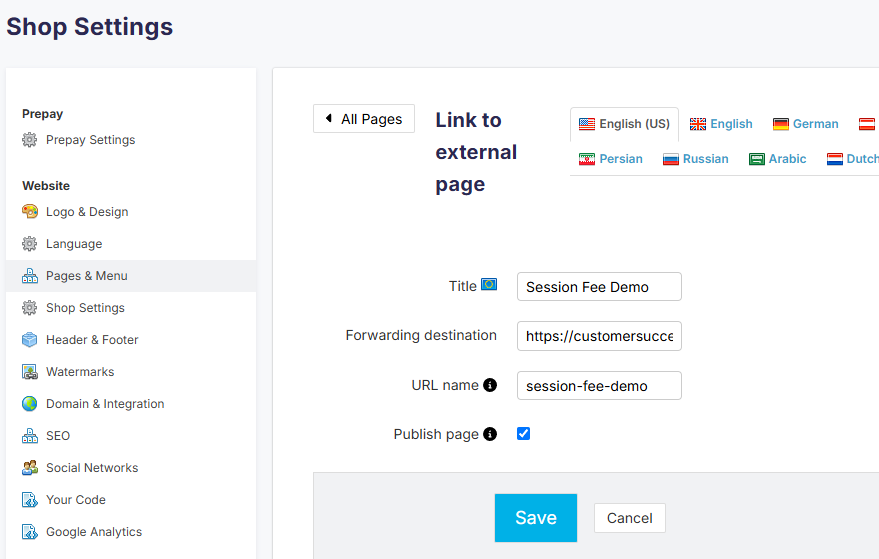
- Select Add new page, and then select the page type External page.
- Configure the page:
- Title: Enter the name displayed in your shop menu, for example, Pay your Session Fee.
- Forwarding destination: Paste the Quick Login link you copied.
- URL name: Enter a URL for the session fee page, for example, session-fee-ABC-league. Do not use spaces.
- Publish page: Select this option to make the page visible in your shop.
- Save the settings.
The new page will appear in your shop menu:
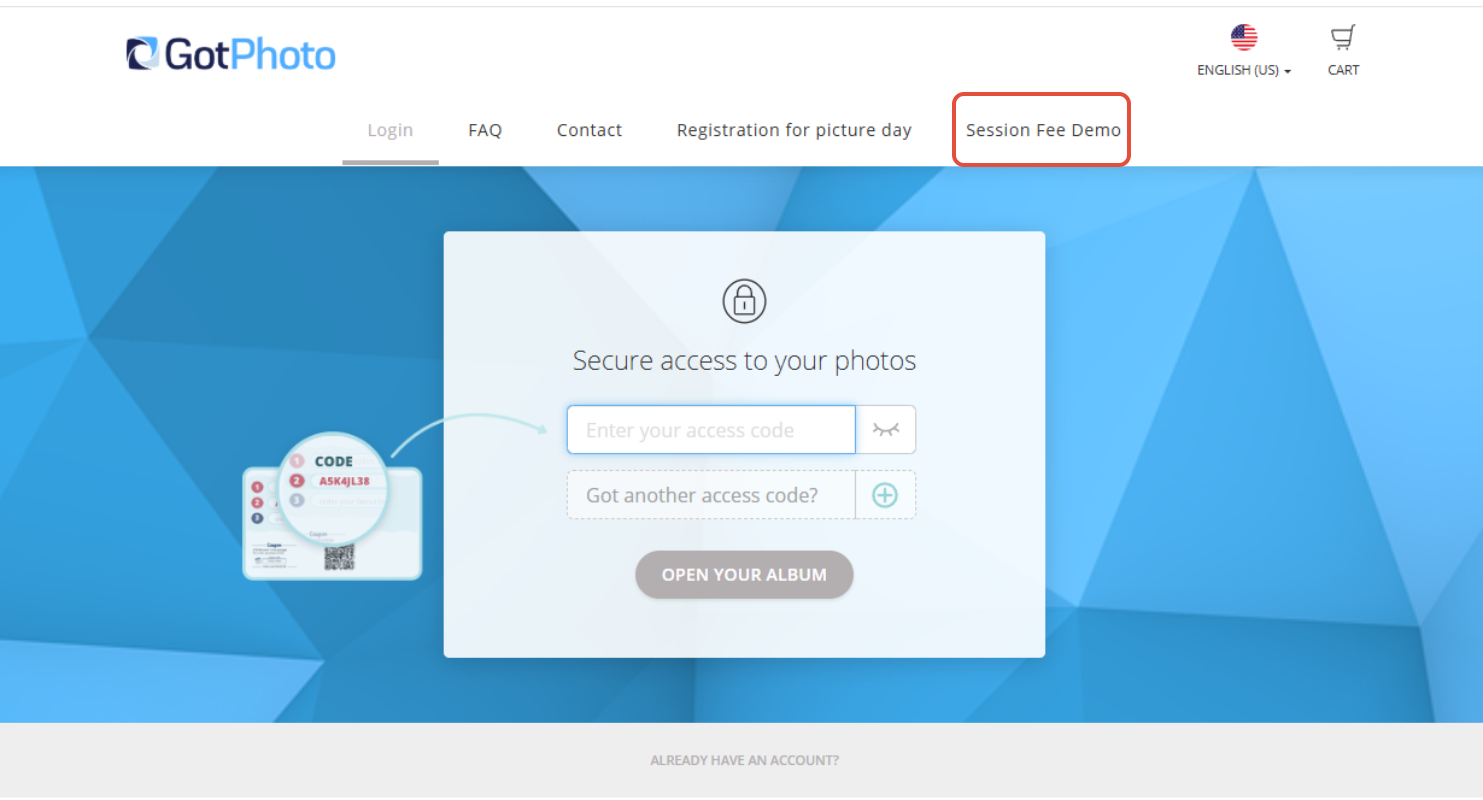
5. Add an album and placeholder image
- Open the Photo Management page of your Session Fee job.
- Create an album and give it a name such as Pay your session fee.
- Upload a placeholder image to the album.
- You can also remove the watermark for this job.
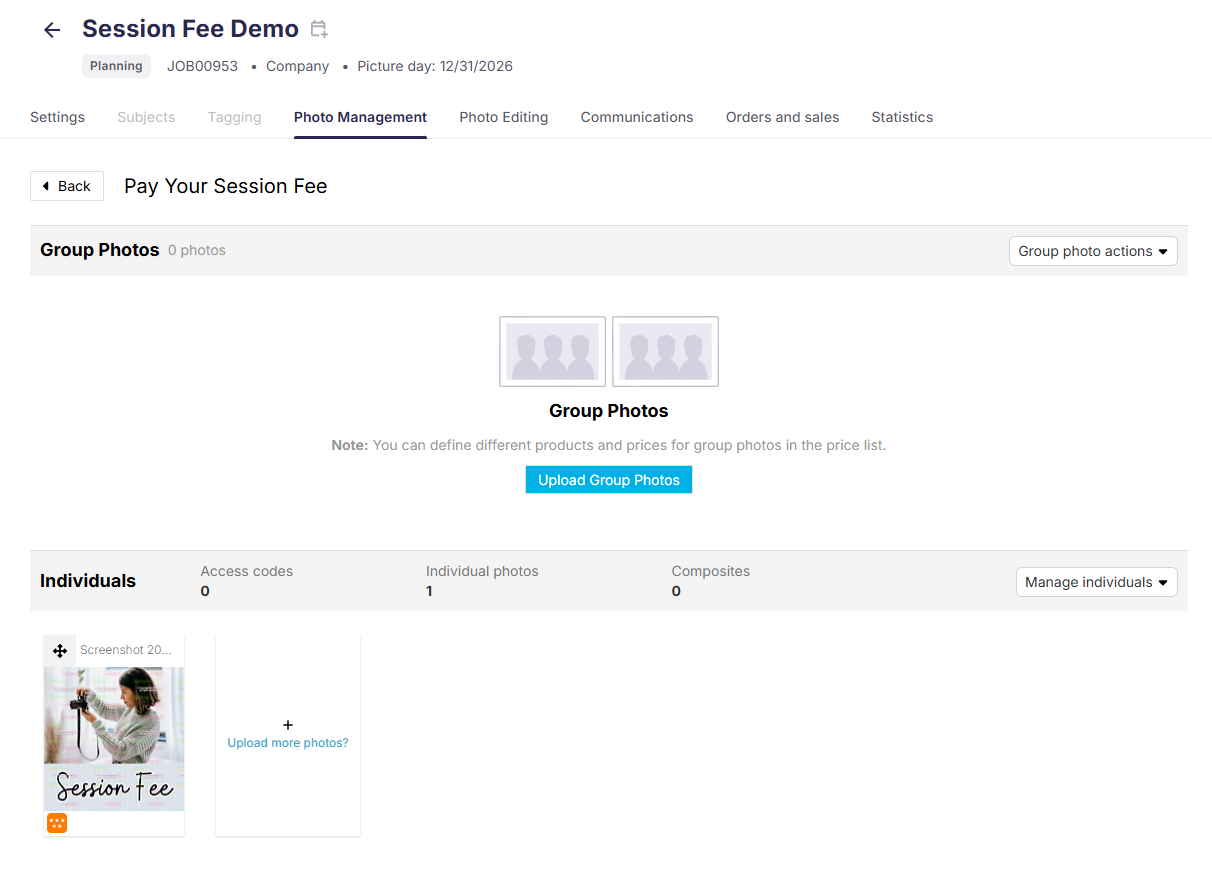
6. Review and share the page
- When everything is configured, set the job to Selling. This also allows you to preview the shop.
- Open the Session Fee page in your shop and review the customer experience.
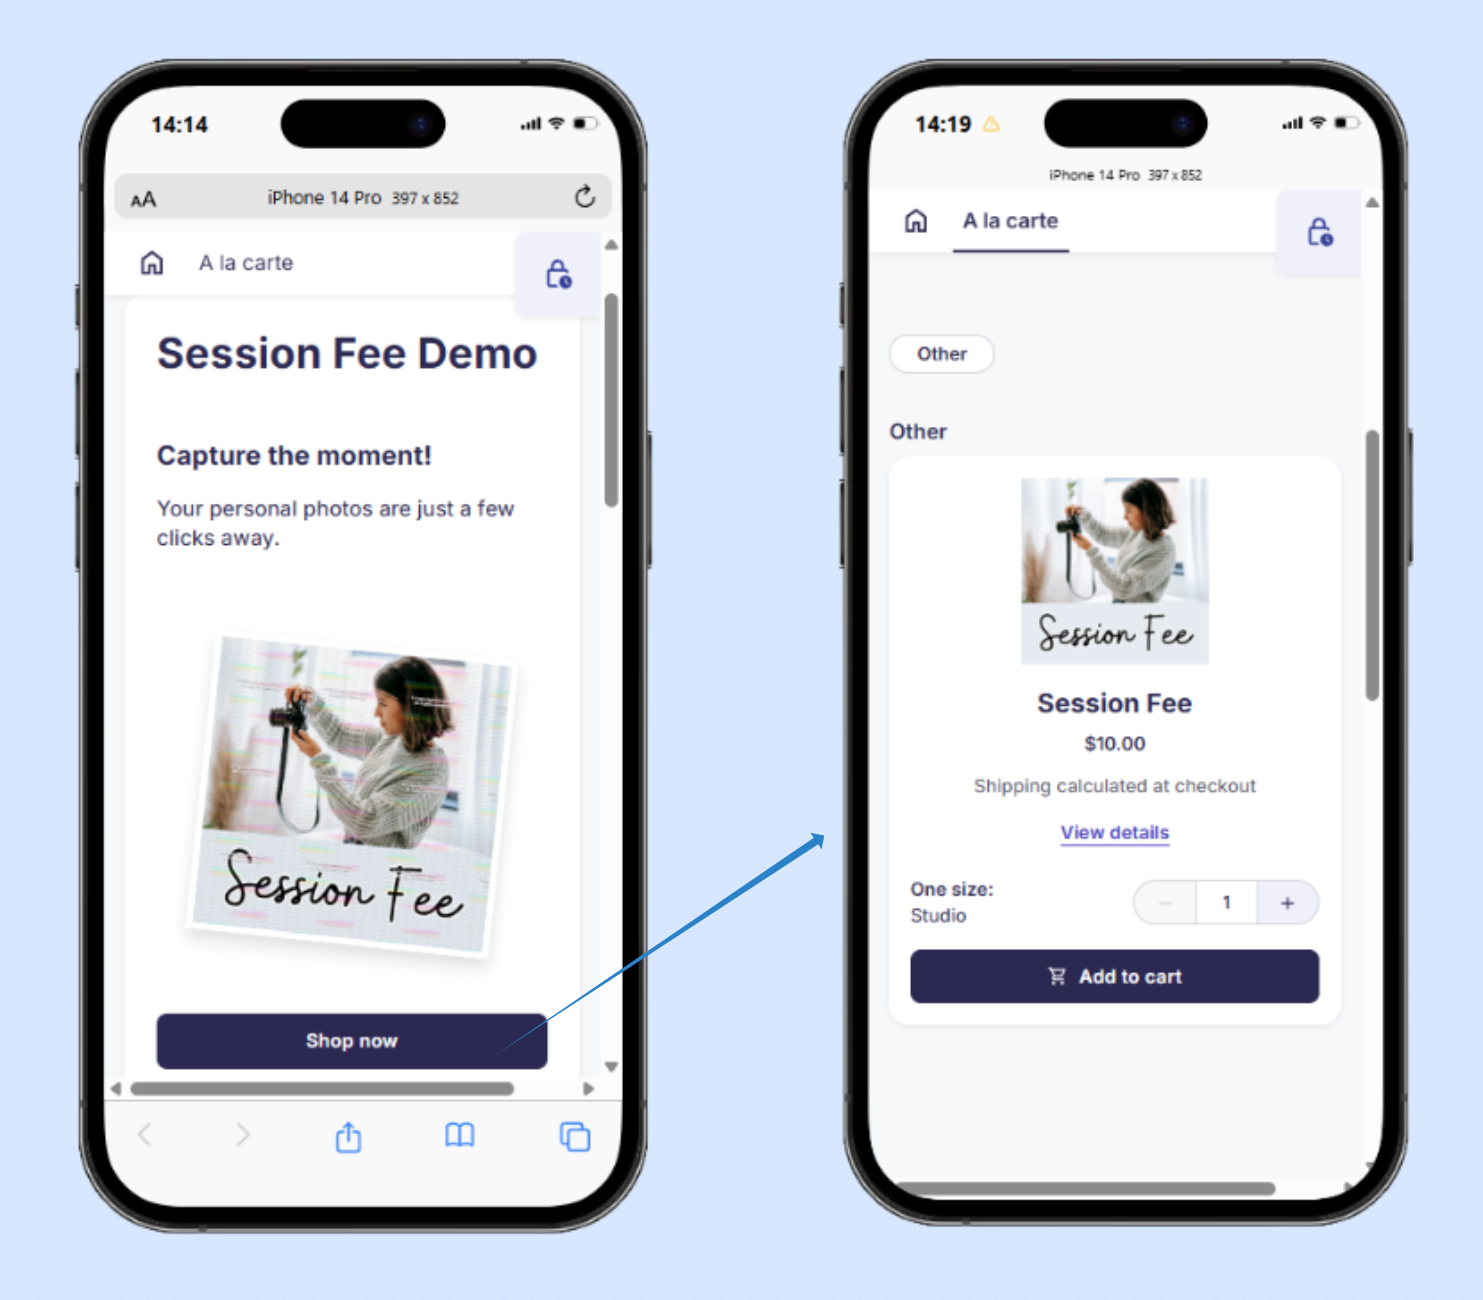
- Share the page with your organization so they can distribute it to parents or participants.
- You can also download the scannable QR code from the job settings page and print it on flyers or posters, giving participants quick and easy access to the session fee page.
Alternative workflow: Collect session fees with Prepay
Please note: Prepay is not activated by default. It is available to North American customers on higher-tier plans with specific business needs. If you believe Prepay may be a good fit for your account, contact your account manager.
In a photo job using QR tagging with a list of names, configure the Prepay settings and assign a Prepay price list that contains only the Session Fee product.
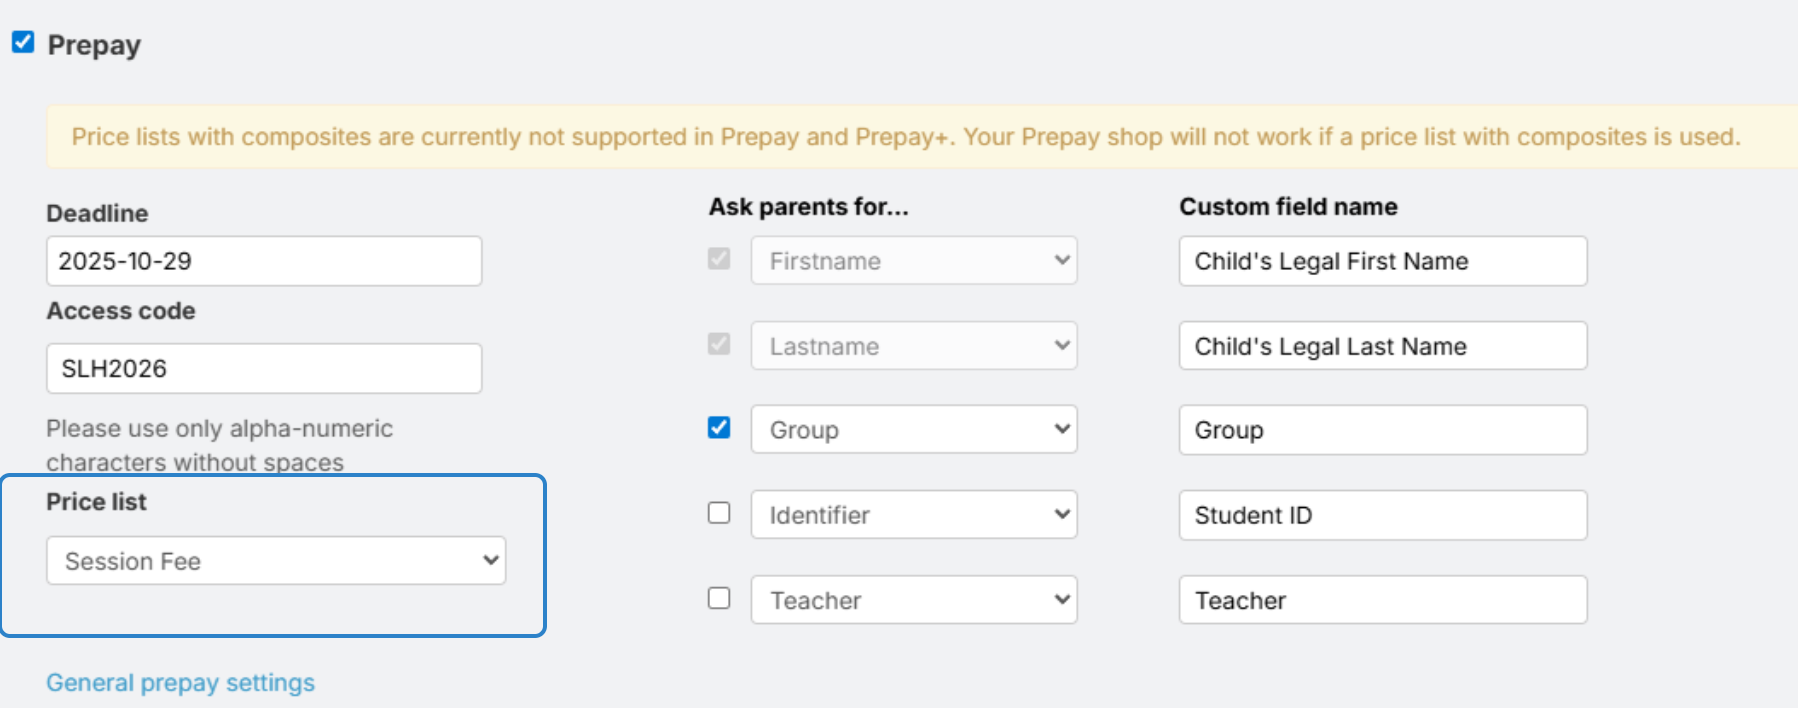
The Session Fee product will appear in the Prepay shop:

Provide a coupon for a future purchase
To credit the session fee toward a future purchase, add a job-level coupon with the same value as the session fee to the photo job where you will later upload, publish, and sell the photos.

Please note: Customers can redeem only one coupon or voucher per purchase. If a job-level coupon is applied automatically and a customer enters another voucher code before checkout, the manually entered voucher will replace the job-level coupon.
Takeaway
While we plan to offer an integrated scheduling tool in the future, you can use a One Access Code job as a workaround to collect session fees in advance. You can then direct customers to an external scheduling tool after their payment is complete.